Stop a Leaking Sink Trap: UK DIY Repair Guide
By The FixDelivered Team · Updated 2026-08-08 · 7 min read
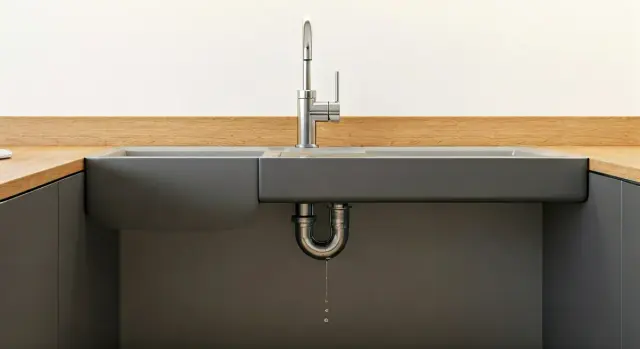
A persistent drip from under your kitchen or bathroom sink can be more than just an annoyance; it can lead to significant water damage, mould growth, and unpleasant odours. Fortunately, a leaking sink trap is often a straightforward plumbing issue that many homeowners can fix themselves with a few basic tools and a bit of patience. This guide will walk you through identifying the problem, gathering your equipment, and step-by-step instructions to get your sink trap sealed and dry.
Why Fix a Leaking Sink Trap Promptly?
Ignoring a small leak can turn into a big problem. Even a slow drip can cause:
- Water Damage: Constant moisture can warp wooden cabinets, damage flooring, and compromise the structural integrity of your under-sink area.
- Mould and Mildew: Damp, dark environments are ideal breeding grounds for mould, which can cause health issues and be costly to remove.
- Unpleasant Odours: Stagnant water and mould contribute to musty smells that can permeate your kitchen or bathroom.
- Increased Water Bills: While a drip might seem minor, over time, it adds up to wasted water and higher utility costs.
Common Causes of Sink Trap Leaks
Understanding the source of the leak is the first step to fixing it. Here are the most common culprits:
- Loose Connections: Over time, the slip nuts that hold the trap components together can loosen, especially with vibrations or temperature changes.
- Worn or Perished Washers/Seals: Rubber or plastic washers inside the slip nuts can degrade, crack, or harden, losing their ability to create a watertight seal.
- Cracked Plastic or Corroded Metal: The trap itself, if made of plastic, can crack due to impact or age. Metal traps can corrode and develop pinhole leaks.
- Clogs and Blockages: A severe blockage can cause water to back up and put pressure on the trap, potentially forcing water past seals or exacerbating existing weaknesses.
- Improper Installation: If the trap wasn't assembled correctly in the first place, or if components were cross-threaded, leaks can occur from day one.
Tools You'll Need
Before you begin, gather these essential items:
- Bucket or Large Bowl: To catch any water that drains from the trap.
- Towels or Rags: For cleaning up spills and drying components.
- Adjustable Spanner or Pipe Wrench: For tightening or loosening metal slip nuts.
- Pliers (Optional): Sometimes useful for plastic nuts, but be careful not to overtighten.
- Replacement Washers/Seals: It's a good idea to have a set of common sizes on hand, or measure your existing ones. These are inexpensive and often the cause of leaks.
- PTFE Tape (Plumber's Tape): For wrapping threads on metal connections to enhance the seal. Not typically used on plastic compression fittings.
- Wire Brush or Old Toothbrush: For cleaning grime and old sealant from threads.
- Gloves: To protect your hands from dirty water and potential sharp edges.
- Torch or Headlamp: To illuminate the confined space under the sink.
Safety First!
Always prioritise safety when undertaking DIY plumbing tasks:
- Turn Off Water: Locate the stopcock under your sink (if present) or the main stopcock for your home and turn off the water supply before starting any work on pipes.
- Wear Protection: Use gloves to protect your hands. Eye protection is also advisable.
- Never Mix Chemicals: If you've recently used drain cleaner, be cautious. Never mix different cleaning agents, as this can create dangerous fumes.
- Be Gentle with Old Pipes: Corroded or aged pipes can be fragile. Apply gentle pressure to avoid causing further damage.
Step-by-Step Guide to Fixing a Leaking Sink Trap
1. Prepare Your Workspace
Clear out everything from under the sink. Place your bucket or bowl directly under the sink trap to catch any water that will drain out. Lay down old towels or rags to absorb spills.
2. Identify the Exact Leak Source
Dry the entire sink trap and surrounding pipes thoroughly with a rag. Once dry, run a small amount of water down the sink and carefully observe where the leak originates. It might be from a slip nut, a joint, or a crack in the trap body itself.
3. Shut Off the Water Supply
This is crucial. Turn off the stopcock under the sink. If you don't have one, turn off the main stopcock for your property. Open the tap fully to drain any remaining water from the pipes.
4. Disassemble the Trap
For most sink traps (P-traps or S-traps), you'll see two or three slip nuts holding the sections together. Place your bucket directly underneath. Carefully loosen these nuts by hand or with an adjustable spanner (for metal traps). For plastic traps, often hand-tightening is sufficient, but pliers can help loosen stubborn nuts – be very gentle to avoid cracking the plastic. Once the nuts are loose, carefully remove the trap sections. Be prepared for a small amount of water to drain out.
5. Inspect All Components
Once disassembled, thoroughly inspect each part:
- Washers/Seals: These are usually found inside the slip nuts. Check them for cracks, hardening, flattening, or any signs of wear. If they look anything but perfectly supple and intact, replace them.
- Trap Body: Look for any hairline cracks, especially in plastic traps. If the trap body is cracked, it will need to be replaced entirely. For metal traps, check for corrosion or pinholes.
- Threads: Clean any grime, old sealant, or debris from the threads of the pipes and nuts using your wire brush or toothbrush.
6. Replace Worn Parts and Reassemble
This is where the fix happens. If you found damaged washers, replace them with new ones of the correct size. If you're working with metal pipes, you can apply a thin layer of PTFE tape clockwise around the threads of the pipe ends before reassembling. This helps create a better seal. Plastic traps usually rely solely on the compression of the washer, so PTFE tape isn't typically used.
Carefully reassemble the trap, ensuring all washers are correctly seated. Hand-tighten the slip nuts first. Once snug, use your spanner or pliers for a final quarter-turn to secure plastic nuts, or tighten metal nuts firmly but without excessive force. Overtightening can crack plastic or strip threads.
7. Test for Leaks
Once everything is reassembled, turn the water supply back on slowly. Run water down the sink for a minute or two, carefully inspecting all joints and the trap body for any signs of dripping. If you see a leak, try tightening the nearest slip nut a tiny bit more. If the leak persists, you may need to disassemble, re-inspect the washer, and ensure it's seated correctly.
8. Final Check
Once you're satisfied there are no leaks, dry the area completely and keep an eye on it for the next few hours or day to ensure the fix holds.
When to Call a Professional
While many sink trap leaks are DIY-friendly, there are times when it's best to call in a professional plumber:
- Persistent Leaks: If you've tried to fix the leak and it keeps returning, or you can't pinpoint the source.
- Complex Plumbing: If your sink is part of a more intricate waste system, or you have unusual pipe configurations.
- Damaged Main Waste Pipe: If the leak isn't from the trap itself but from the main waste pipe leading away from it, this often requires more advanced repair.
- Corroded or Fragile Pipes: Older pipework can be very delicate. Attempting to fix it yourself might cause further, more extensive damage.
- Lack of Confidence: If you're simply not comfortable undertaking the repair, or don't have the right tools.
For urgent or complex issues, you can quickly tell us your emergency and we’ll connect you with emergency plumbers near you. Finding a qualified plumber doesn't have to be a headache.
How FixDelivered Can Help
If you find yourself needing professional help, FixDelivered connects you with qualified, local plumbers across the UK. Our service simplifies the process of finding reliable tradespeople, ensuring you get transparent pricing and prompt service for your plumbing emergency. You can learn more about how FixDelivered works on our website.
Conclusion
Fixing a leaking sink trap can save you money and prevent significant property damage. By following these steps, you can often resolve the issue yourself. However, don't hesitate to seek professional help if the problem is beyond your comfort level or expertise. A skilled plumber can quickly diagnose and resolve even the trickiest leaks, giving you peace of mind.
For any plumbing needs, big or small, don't delay. You can always find a local plumber through FixDelivered when you need one.
Frequently asked questions
What is a sink trap?
A sink trap is the U-shaped or P-shaped pipe section located directly under your sink. Its primary purpose is to hold a small amount of water, creating a seal that prevents unpleasant sewer gases from entering your home through the drain.
Why does my sink trap leak?
Common reasons for a leaking sink trap include loose connections where the trap components join, degraded or perished rubber/plastic washers and seals, hairline cracks in plastic traps, or corrosion and pinholes in older metal traps. Sometimes, a severe blockage can also put pressure on the trap, causing leaks.
Can I use superglue to fix a cracked plastic sink trap?
No, superglue or similar adhesives are generally not suitable for plumbing repairs, especially on parts like a sink trap that are constantly exposed to water pressure and waste. A cracked plastic trap indicates structural failure and should be replaced entirely to ensure a lasting, watertight seal.
How often should I replace sink trap washers?
There's no strict schedule for replacing sink trap washers. However, if you're disassembling the trap for any reason (e.g., to clear a blockage or address a leak), it's always good practice to replace any washers that appear stiff, flattened, cracked, or otherwise worn. They are inexpensive and vital for a watertight seal.
What should I do if my sink trap leak persists after trying to fix it?
If you've followed the DIY steps and the leak from your sink trap continues, it's best to call a professional plumber. The issue might be more complex than a simple washer replacement or loose connection, potentially involving a deeper crack, an improperly sized part, or a problem further down the waste pipe system.
Need a plumber now? Tell us your emergency and FixDelivered will find and confirm an available local plumber near you, usually within the hour.
Written by the FixDelivered Team. Reviewed by Rupert Lowe, Editor. Last updated 2026-08-08.