Advice & guides › Prevention & Maintenance
Central Heating Inhibitor: Your System's Lifeline
By The FixDelivered Team · Updated 2026-09-25 · 7 min read
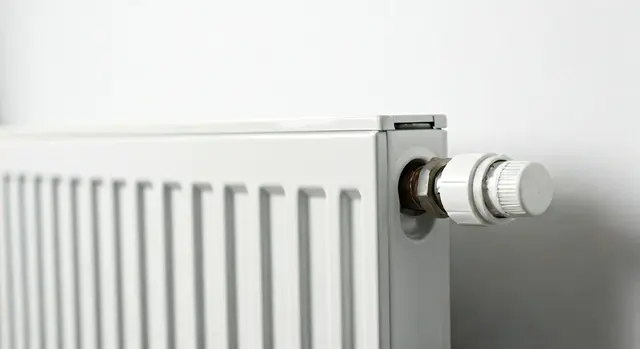
Your central heating system is a significant investment, and like any complex machinery, it requires proper care to function efficiently and last for years. One of the most overlooked yet crucial aspects of its maintenance is the use of central heating inhibitor. This article will explain what inhibitor is, why it's indispensable for UK homes, and guide you through the process of adding it to your system.
What is Central Heating Inhibitor?
Central heating inhibitor is a chemical solution designed to protect the metallic components within your heating system from corrosion. Over time, the water circulating in your radiators, pipes, and boiler can react with the metal, leading to rust and the formation of sludge. Inhibitor creates a protective layer on these surfaces, preventing this corrosive process.
Why Your Heating System Needs Inhibitor
Without adequate protection, your central heating system is vulnerable to several issues that can significantly impact its performance and lifespan:
- Corrosion: This is the primary problem inhibitor tackles. Rusting metals break down, leading to pinhole leaks in radiators and pipes.
- Sludge Build-up: The by-products of corrosion, primarily iron oxide, mix with water to form a thick, black sludge. This sludge settles in radiators, pipes, and heat exchangers.
- Reduced Efficiency: Sludge acts as an insulator, preventing heat from radiating effectively from your radiators. Your boiler has to work harder to achieve the desired temperature, consuming more energy and increasing your heating bills.
- System Blockages: Severe sludge build-up can block pipes, valves, and even the boiler's heat exchanger, leading to cold spots in radiators or complete system failure.
- Boiler Damage: Sludge is particularly detrimental to boilers. It can cause strain on the pump, block internal components, and lead to costly breakdowns. Modern high-efficiency boilers with their narrower waterways are especially susceptible.
- Shortened Lifespan: All these issues contribute to premature wear and tear, significantly reducing the overall lifespan of your central heating system and boiler.
By preventing these problems, inhibitor helps maintain your system's efficiency, extends its life, and reduces the likelihood of expensive repairs.
How Often Should Inhibitor Be Checked and Added?
It's generally recommended that the concentration of central heating inhibitor in your system be checked annually as part of your boiler's service. Most inhibitors are effective for around 5-6 years, but this can vary depending on the product and the specific conditions of your system. If you've drained your system for any reason (e.g., to replace a radiator or carry out repairs), you'll need to top up or completely replenish the inhibitor afterwards.
DIY Guide: Adding Central Heating Inhibitor
Adding inhibitor is a relatively straightforward task for a competent DIYer. However, if you're unsure or uncomfortable, it's always best to call a professional.
Tools You'll Need:
- Central heating inhibitor (check your system volume to ensure you buy enough – typically one bottle treats a standard UK home with 10-15 radiators).
- Adjustable spanner or radiator key.
- Bucket or old towels.
- Screwdriver (if accessing a filling loop).
- Gloves and eye protection (recommended for handling chemicals).
Safety Cautions:
- Always read the inhibitor manufacturer's instructions carefully before starting.
- Wear appropriate personal protective equipment (PPE), such as gloves and eye protection.
- Be aware that the system water can be hot if recently run. Allow it to cool down.
- If you have any doubts about depressurising your system or handling chemicals, stop and call a professional.
Step-by-Step Instructions:
- Turn Off Your Heating System: Switch off your boiler and allow the system to cool down completely.
- Identify Your Access Point: You typically have two main options for adding inhibitor:
- Via a Radiator: This is the most common method. Choose an upstairs radiator, preferably one that's easy to access and has a thermostatic radiator valve (TRV) on one side and a lockshield valve on the other.
- Via the Filling Loop/Draining Point: Some systems have a dedicated filling loop or a draining point where inhibitor can be injected. This is often found near the boiler.
- Depressurise the System (if adding via radiator):
- Close both valves on your chosen radiator (TRV fully clockwise, lockshield fully clockwise).
- Place a bucket or towels underneath the radiator valve you intend to open (usually the one without the TRV, or the TRV side if you plan to remove the TRV head).
- Using your radiator key or spanner, slowly open the bleed valve on the radiator to release any trapped air.
- Then, slowly loosen the nut connecting the radiator to the valve you chose. Water will start to come out. Allow enough water to drain into your bucket to create space for the inhibitor (typically 1-2 litres). Close the nut once enough water is drained.
- Add the Inhibitor:
- Via Radiator: Unscrew the bleed valve entirely. Carefully pour the inhibitor into the opening using a funnel if necessary. Once added, replace and tighten the bleed valve.
- Via Filling Loop/Drain Point: Follow the inhibitor manufacturer's specific instructions. This usually involves connecting the inhibitor bottle to a valve and using the system's pressure to draw it in, or pouring it into a dedicated dosing pot if one is installed.
- Repressurise the System:
- If you added via a radiator, open both radiator valves fully.
- Locate your boiler's filling loop (a small braided hose with two valves, usually underneath the boiler) or the external filling point.
- Slowly open one valve on the filling loop, then the other, watching your boiler's pressure gauge.
- When the pressure reaches the recommended level (typically between 1 and 1.5 bar when cold), close both valves on the filling loop firmly.
- Bleed Radiators and Check for Leaks: Go around all your radiators, starting with the lowest, and bleed them to release any trapped air. Check for any leaks around the radiator valves or where you added the inhibitor.
- Restart Your Heating: Turn your boiler back on and allow the system to run for at least an hour to circulate the inhibitor. Check the pressure again and top up if necessary.
When to Call a Professional:
While adding inhibitor can be a DIY task, there are times when professional help is essential:
- If you are uncomfortable or unsure about any step of the process.
- If your system frequently loses pressure, indicating a leak that needs addressing first.
- If your radiators have significant cold spots even after bleeding, suggesting a severe sludge problem that might require a powerflush.
- If you suspect internal boiler issues or need advice on your entire heating system's health.
For any significant heating system issues, or if you prefer a professional to handle your inhibitor top-up, you can always get a plumber now through FixDelivered. We connect you with qualified emergency plumbers near you quickly and efficiently.
Costs Involved (2026 Estimates)
The cost of central heating inhibitor itself is relatively low, typically ranging from £15 to £25 for a standard bottle that treats an average system. If you hire a professional to add inhibitor as a standalone service, you can expect to pay roughly £80 to £150, depending on your location and the complexity of accessing your system. Often, this service is included as part of an annual boiler service. For more severe sludge issues requiring a powerflush, costs can range from £400 to £800, which is why preventative measures like inhibitor are so cost-effective.
Gas Safety Reminder: Any work involving gas appliances, such as your boiler's internal components, must only be carried out by a Gas Safe registered engineer. Never attempt to open your boiler's casing yourself unless you are qualified to do so.
Conclusion
Central heating inhibitor is a small investment that yields significant returns in terms of system efficiency, longevity, and reduced repair costs. Regular checks and timely application can save you from the headache and expense of a failing heating system. Whether you choose to tackle it yourself or opt for professional assistance, ensuring your system is adequately protected is a smart choice for any UK homeowner.
If you ever need a reliable professional for your heating system, remember FixDelivered makes it easy to find a local plumber. Learn more about how FixDelivered works and get your plumbing needs sorted quickly.
Frequently asked questions
How do I know if my central heating system needs inhibitor?
Common signs include cold spots on radiators (especially at the bottom), noisy boiler or pipes (gurgling, banging), frequent need to bleed radiators, or discoloured water when bleeding. An annual boiler service should include checking inhibitor levels.
Can I mix different brands of central heating inhibitor?
It's generally not recommended to mix different brands of inhibitor unless specified by the manufacturer. Different formulations might react adversely or reduce effectiveness. Stick to one brand or flush the system thoroughly before switching.
How long does central heating inhibitor last?
Most central heating inhibitors are designed to last for about 5-6 years in a sealed system. However, this can be reduced if the system is frequently drained or topped up with fresh water. Annual checks are advisable.
Is central heating inhibitor toxic?
Central heating inhibitors are chemical solutions and should be handled with care. They are typically low toxicity but can cause irritation to skin and eyes. Always wear gloves and eye protection, and keep them out of reach of children and pets. Follow manufacturer safety guidelines.
Need a plumber now? Tell us your emergency and FixDelivered will find and confirm an available local plumber near you, usually within the hour.
Written by the FixDelivered Team. Reviewed by Rupert Lowe, Editor. Last updated 2026-09-25.