Fix a Leaking Flexible Tap Connector (Flexi Hose)
By The FixDelivered Team · Updated 2026-09-27 · 7 min read
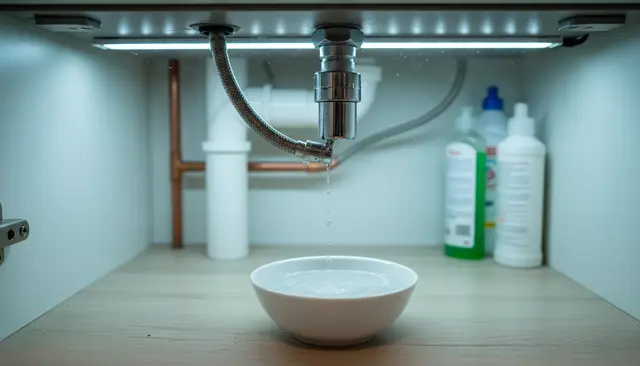
A persistent drip or a small puddle under your sink is often a sign of a leaking flexible tap connector, commonly known as a 'flexi hose'. These essential components connect your taps to the water supply, and while convenient, they can fail over time. Addressing a flexi hose leak promptly is crucial to prevent significant water damage, mould growth, and potentially costly repairs. Fortunately, replacing a leaking flexible tap connector is a manageable DIY task for most competent adults, potentially saving you the cost of a plumber's call-out.
What is a Flexible Tap Connector (Flexi Hose)?
Flexible tap connectors are braided hoses, typically made of stainless steel or plastic, designed to connect your tap's tail to the hot and cold water supply pipes. They are widely used in modern plumbing installations due to their ease of fitting and flexibility, allowing taps to be installed even if the supply pipes aren't perfectly aligned. You'll find them under kitchen sinks, bathroom basins, and often connecting toilets to their water supply.
Why Do Flexi Hoses Leak?
Several factors can lead to a flexible tap connector failing:
- Age and Wear: Like any plumbing component, flexi hoses have a lifespan. Over time, the rubber inner tube can degrade, or the braiding can corrode, leading to pinhole leaks.
- Corrosion: Exposure to water, especially in damp environments, can cause the metal braiding or end fittings to corrode.
- Overtightening: During installation, overtightening the nuts can damage the rubber washer inside the connector, compromising the seal and leading to leaks.
- Manufacturing Defects: Occasionally, a hose may have a fault from new, though this is less common with reputable brands.
- Damage During Installation or Maintenance: Accidental nicks or bends during fitting or subsequent work can weaken the hose.
Tools and Materials You'll Need
Before you begin, gather the following:
- New Flexible Tap Connector: Ensure it's the correct length and thread size for your tap and supply valve. Take the old one to a plumbing merchant if unsure.
- Adjustable Spanner: For loosening and tightening nuts. A basin wrench can be very helpful for hard-to-reach tap tails.
- Bucket and Towels: To catch any residual water.
- Head Torch or Good Lighting: The area under sinks can be dark.
- Safety Glasses: To protect your eyes from drips or debris.
- Cleaning Cloth/Wipes: For tidying up afterwards.
Safety First
Working with water supply requires caution. Always prioritise safety:
- Isolate Water Supply: This is the most critical step. Ensure both hot and cold water supplies to the tap are completely turned off before attempting any work. If your tap doesn't have isolation valves, you'll need to turn off the main stopcock for your property.
- Wear Safety Glasses: Water can spray unexpectedly.
- Beware of Hot Water: If working on the hot water supply, remember the water inside the pipes can be very hot.
- Electrical Safety: If there are any electrical sockets or appliances under the sink, ensure they are switched off and protected from water splashes.
Step-by-Step Guide: Replacing a Leaking Flexible Tap Connector
Follow these steps carefully to replace your leaking flexi hose.
Step 1: Prepare the Area and Isolate Water Supply
- Clear the Cabinet: Remove everything from the cupboard under the sink to give yourself ample space to work.
- Turn Off Water Supply: Look for isolation valves (small quarter-turn or screw-down valves) on the hot and cold water pipes directly beneath the tap. Turn them off completely. If you don't have isolation valves, you must turn off your home's main stopcock.
- Drain Residual Water: Open the tap to release any pressure and drain water remaining in the pipes. Keep the tap open during the repair.
- Position Bucket and Towels: Place a bucket directly under the leaking connector and lay towels around the area to catch any drips.
Step 2: Disconnect the Old Flexi Hose
- Locate Connections: Identify the two connection points of the flexible hose: one to the tap tail (the pipe extending from the tap itself) and one to the water supply valve.
- Loosen Bottom Connection: Using your adjustable spanner, carefully loosen the nut connecting the flexi hose to the water supply valve first. Be prepared for some water to dribble out.
- Loosen Top Connection: Next, loosen the nut connecting the flexi hose to the tap tail. This can often be the trickiest part due to limited space. A basin wrench can be invaluable here.
- Remove Old Hose: Once both ends are loose, carefully remove the old, leaking flexible hose.
Step 3: Prepare the New Flexi Hose
- Inspect New Hose: Take your new flexible tap connector and inspect it for any signs of damage. Ensure the rubber washers are correctly seated inside both nuts. These washers are crucial for a watertight seal.
- PTFE Tape (Generally Not Needed): For flexible tap connectors, the rubber washer provides the seal, so PTFE tape is typically not needed on the threads of the flexi hose nuts themselves. Applying it can sometimes interfere with the washer seating correctly.
Step 4: Connect the New Flexi Hose
- Connect to Tap Tail First: It's usually easier to attach the hose to the tap tail first. Hand-tighten the nut as much as you can.
- Connect to Water Supply Valve: Then, hand-tighten the other end of the hose onto the water supply valve.
- Tighten with Spanner: Once both ends are hand-tight, use your adjustable spanner (or basin wrench for the tap tail) to gently tighten the nuts. Do not overtighten. A quarter to half a turn past hand-tight is usually sufficient. Overtightening can crush the rubber washer and lead to a leak or damage the threads.
Step 5: Test for Leaks
- Slowly Restore Water: Gradually open the isolation valves (or your main stopcock) that you closed earlier.
- Check for Immediate Drips: Carefully inspect both connections of the new flexible hose for any signs of dripping or seepage.
- Open Tap Fully: Once you've confirmed no immediate drips, open the tap fully (both hot and cold, if applicable) to allow water to flow through the new hose under full pressure.
- Re-inspect: Check again for any leaks, paying close attention to the connection points. It's a good idea to leave a dry piece of kitchen roll under the connections for 15-30 minutes and then check it again to ensure there are no slow drips.
- Tidy Up: Once you're satisfied there are no leaks, you can close the tap and replace everything in your cabinet.
When to Call a Professional
While replacing a flexi hose is a common DIY task, there are times when it's best to call in an expert:
- Seized or Corroded Fittings: If the nuts are old, corroded, or simply won't budge, forcing them can cause more damage.
- No Isolation Valves/Main Stopcock Issues: If you can't turn off the water supply or your main stopcock is stuck, a professional plumber has the tools and expertise to handle this safely.
- Tap Itself is Leaking: If the leak isn't from the flexi hose but from the tap body or spout, it's a more complex repair.
- Lack of Confidence: If you're unsure at any stage or simply uncomfortable with the task, it's always better to seek professional help than risk further damage.
If you find yourself in a tricky spot, don't hesitate to contact a professional. FixDelivered can connect you with qualified local plumbers fast. While a DIY fix can save money, a professional plumber typically charges between £75-£150 for a call-out and a simple repair like this, plus parts, though this can vary based on your location and the time of day. You can also learn more about how FixDelivered works.
Preventing Future Leaks
- Regular Inspection: Periodically check under your sinks for any signs of dampness or corrosion around flexible connectors.
- Avoid Overtightening: When installing any new connector, remember that hand-tight plus a quarter to half a turn with a spanner is usually enough.
- Use Quality Parts: Invest in good quality flexible hoses from reputable brands.
- Consider Periodic Replacement: Some plumbers recommend replacing flexi hoses every 5-10 years as a preventative measure, especially if they are in hard-to-reach areas or in properties prone to hard water.
Replacing a leaking flexible tap connector is a practical skill that can save you from a minor annoyance escalating into a major plumbing emergency. By following these steps, you can tackle the problem with confidence. For any plumbing emergencies or complex repairs, remember you can always get a plumber now through FixDelivered. Our service helps you find emergency plumbers near you quickly, with transparent upfront agreed call-out fees.
Frequently asked questions
How often should flexible tap connectors (flexi hoses) be replaced?
While there's no strict rule, many plumbers recommend considering replacement every 5-10 years, especially if they are showing signs of wear, corrosion, or if you're undertaking other plumbing work under the sink. Regular inspection is key.
Can I use PTFE tape on a flexible tap connector?
Flexible tap connectors typically seal using a rubber washer inside the nut, making PTFE tape on the threads of the hose's nuts unnecessary and potentially counterproductive. The washer creates the watertight seal. If the male thread of the isolation valve or tap tail is old or damaged, a very small amount of PTFE tape on that male thread *before* attaching the flexi hose *might* help, but the primary seal should always be the washer.
What size flexible tap connector do I need?
Flexible tap connectors come in various lengths and thread sizes. The most common sizes for taps are 1/2 inch or 3/8 inch for the tap tail connection, and usually 1/2 inch for the water supply valve connection. It's best to remove the old hose and take it to a plumbing merchant to ensure you get an exact match for both length and thread size.
What if the leak isn't from the flexible tap connector?
If you've replaced the flexi hose and the leak persists, the problem likely lies elsewhere. Common culprits include a faulty tap cartridge or O-rings within the tap itself, a leak from the isolation valve, or even a crack in the sink basin. In such cases, it's advisable to consult a professional plumber.
Need a plumber now? Tell us your emergency and FixDelivered will find and confirm an available local plumber near you, usually within the hour.
Written by the FixDelivered Team. Reviewed by Rupert Lowe, Editor. Last updated 2026-09-27.