Fix a Leaking Toilet Cistern: UK DIY Guide
By The FixDelivered Team · Updated 2026-09-13 · 7 min read
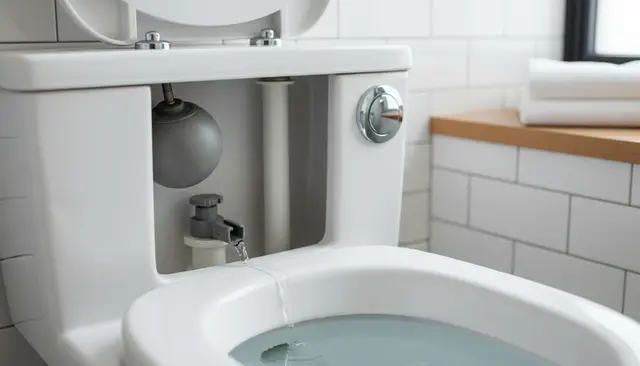
A constantly running or silently dripping toilet cistern is more than just an annoyance; it's a significant waste of water and money. In the UK, a continuously running toilet can waste between 200 and 400 litres of water a day – that's enough to fill two bathtubs! Fixing a leaking toilet cistern is often a straightforward DIY job that can save you a substantial amount on your water bill.
How to Identify a Leaking Toilet Cistern
Sometimes a leak is obvious, like water pooling around the base of the toilet. More often, it’s a silent, internal leak from the cistern into the toilet bowl that goes unnoticed. Here’s how to check:
- The Dye Test: Remove the cistern lid and add a few drops of food colouring (or a toilet dye tablet) into the cistern water. Do not flush. Wait for at least 15-20 minutes. If you see coloured water in the toilet bowl, you have an internal leak.
- Listen Carefully: Listen for the sound of water continuously running or trickling into the toilet bowl, even when it hasn't been flushed.
- Check for Condensation: If the leak is external, you might notice condensation or drips on the outside of the cistern or around its base, indicating a seal or bolt issue.
Common Causes of a Cistern Leak
Most cistern leaks stem from one of two main components:
- The Inlet Valve (Fill Valve): This controls the water filling the cistern. If the water level is too high, or the valve mechanism is faulty, water will continuously flow into the overflow pipe and down into the toilet bowl.
- The Flush Valve (Siphon or Drop Valve): This is at the bottom of the cistern and opens to release water into the bowl when flushed. A worn or dirty seal (often called a flapper or diaphragm) on this valve will allow water to seep into the bowl when it should be sealed.
- Cistern Bolts/Washers: The bolts that secure the cistern to the toilet pan can develop leaks if their rubber washers perish or become loose.
- Cracked Cistern: While less common, a hairline crack in the ceramic cistern can cause an external leak. This usually requires replacement.
Tools and Materials You'll Need
Before you start, gather these basic plumbing tools and potential replacement parts:
- Adjustable spanner or pipe wrench
- Screwdriver (flathead and/or Phillips, depending on your toilet)
- Sponge and old towels/cloths
- Bucket
- Food colouring or dye tablet (for testing)
- Replacement parts:
- Inlet valve washer (diaphragm) or a new universal inlet valve
- Flush valve seal/flapper or a new universal flush valve
- Cistern bolt repair kit (includes new bolts and washers)
Step-by-Step Guide to Fixing Common Cistern Leaks
Step 1: Turn Off the Water Supply
Locate the isolation valve (stopcock) for your toilet, usually found on the pipe leading to the cistern. Turn it clockwise until the water flow stops. If your toilet doesn't have an isolation valve, you'll need to turn off the main water supply to your home.
Step 2: Empty the Cistern
Flush the toilet to empty most of the water from the cistern. Use a sponge and bucket to remove any remaining water. This will give you a dry working area.
Step 3: Identify the Source of the Leak More Precisely
With the cistern empty, you can better inspect the components:
- High Water Level: If, when the water was on, the water level was consistently above the overflow pipe, your inlet valve is the problem.
- Water Running into Pan: If the water level was below the overflow but still running into the pan, your flush valve seal is likely at fault.
- External Leak: If water was leaking from the bottom of the cistern, check the cistern bolts and the connection to the pan.
Step 4: Fixing a Leaky Inlet Valve (Fill Valve)
This valve controls the water filling the cistern. Issues typically mean the cistern overfills.
- Adjust the Float: The float mechanism dictates the water level. For older toilets, this might be a ball float on an arm. For modern toilets, it's often a compact plastic float around the valve stem. Gently bend the arm down (for ball floats) or adjust the screw/clip on the float mechanism to lower the water level. Ensure the water stops at least an inch below the top of the overflow pipe.
- Clean/Replace Diaphragm Washer: If adjusting the float doesn't work, the internal washer (diaphragm) of the inlet valve might be worn. Turn off the water again, then carefully unscrew the top of the inlet valve assembly. Remove the small rubber diaphragm, clean it, or replace it with a new one. These are inexpensive and widely available.
- Replace the Entire Inlet Valve: If the above steps fail, the entire inlet valve might need replacing. This involves disconnecting the water supply pipe from the bottom of the cistern, unscrewing the large nut holding the valve in place, and installing a new one. Universal inlet valves are typically easy to fit.
Step 5: Fixing a Leaky Flush Valve (Siphon/Drop Valve)
This valve is at the bottom of the cistern and its seal often perishes, causing water to constantly trickle into the bowl.
- Inspect and Clean the Seal: For a drop valve (the most common modern type), the seal is a rubber flapper or washer at the base. Gently lift the flush mechanism to access it. For a siphon, the seal is usually at the bottom of the siphon unit itself. Clean any grime or limescale from the seal and its seating area.
- Replace the Seal/Flapper: If cleaning doesn't work, the seal is likely worn. Purchase a matching replacement seal or flapper, which simply clips or slides into place.
- Replace the Entire Flush Valve: If the seal is integrated or the valve is old and corroded, replacing the whole flush valve might be necessary. This is a more involved job, requiring you to detach the cistern from the pan (see Step 6) to access the large nut underneath.
Step 6: Addressing Leaks from Cistern Bolts
If water is leaking externally from where the cistern joins the pan, the bolts or their washers are the culprits.
- Tighten Bolts: With the cistern empty, gently try to tighten the nuts on the cistern bolts (inside the cistern, or underneath if accessible). Be careful not to overtighten and crack the ceramic.
- Replace Washers/Bolts: If tightening doesn't stop the leak, you'll need to replace the rubber washers. This usually means draining the cistern, disconnecting the water supply pipe, and unbolting the cistern from the pan. Lift the cistern off, remove the old washers from the bolts, and fit new ones. A cistern bolt repair kit is a good investment.
Safety Precautions
- Always turn off the water supply before working on your toilet.
- Be careful not to overtighten nuts and bolts, as ceramic can crack.
- If you're unsure at any point, it's best to stop and call a professional.
When to Call a Professional Plumber
While many cistern leaks are DIY-friendly, some situations are best left to a qualified plumber:
- Persistent Leaks: If you've tried the common fixes and the leak continues.
- Cracked Cistern: A cracked ceramic cistern cannot be repaired and needs replacing.
- Complex Valve Issues: If you're struggling to identify the specific valve causing the problem or find the repair too complex.
- Lack of Confidence or Time: If you're not confident in your DIY skills or simply don't have the time, a professional can get the job done quickly and correctly.
For any plumbing emergency or if you need help with a stubborn cistern leak, FixDelivered can connect you with emergency plumbers near you quickly. You can also learn more about how FixDelivered works.
Preventative Maintenance Tips
- Regular Checks: Periodically perform the dye test to catch silent leaks early.
- Cleanliness: Keep the cistern clean from limescale and sediment, which can affect valve seals.
- Avoid Harsh Cleaners: Strong chemical cleaners can degrade rubber seals over time.
Fixing a leaking toilet cistern is a rewarding task that saves water and money. By following these steps, you can tackle most common leaks yourself. However, if you find yourself in deep water, don't hesitate to get a plumber now through FixDelivered. For more helpful advice, browse our plumbing emergency guides.
Frequently asked questions
How much water does a leaking toilet cistern waste?
A continuously running toilet cistern can waste between 200 and 400 litres of water per day, which equates to thousands of litres over a month, significantly increasing your water bill.
Can I fix a leaking toilet cistern myself?
Yes, many common toilet cistern leaks, such as those caused by a faulty inlet valve or a worn flush valve seal, can be fixed by a competent DIY enthusiast with basic tools and readily available replacement parts.
What's the average cost to replace a toilet cistern?
Replacing a toilet cistern itself can cost anywhere from £50-£200 for the unit, depending on the style and brand. If you hire a plumber, expect to pay their call-out fee (typically £70-£120) plus an hourly rate (around £50-£90) for the labour, bringing the total cost for a professional replacement to roughly £150-£350 in 2026, depending on complexity and region.
Need a plumber now? Tell us your emergency and FixDelivered will find and confirm an available local plumber near you, usually within the hour.
Written by the FixDelivered Team. Reviewed by Rupert Lowe, Editor. Last updated 2026-09-13.