How to Replace a Toilet Seat: Stuck Fixings Solved
By The FixDelivered Team · Updated 2026-10-02 · 7 min read
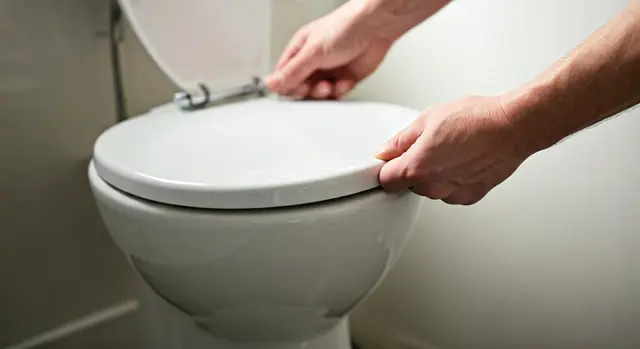
A wobbly, cracked, or stained toilet seat is not just an eyesore; it's a hygiene concern and a comfort issue. Replacing it is a straightforward DIY task for most, but rusted bolts or seized plastic fixings can turn a quick job into a frustrating ordeal. This 2026 UK guide will walk you through replacing your toilet seat, including practical solutions for tackling those stubborn, stuck fixings.
Why Replace Your Toilet Seat?
Beyond aesthetics, there are several good reasons to swap out an old toilet seat:
- Hygiene: Cracks and chips can harbour bacteria, making cleaning difficult.
- Comfort: A wobbly or ill-fitting seat is uncomfortable and potentially unsafe.
- Damage: Accidental drops or heavy use can lead to cracks or breaks.
- Upgrade: Perhaps you want a soft-close mechanism, a quick-release feature for easier cleaning, or a new style to refresh your bathroom.
Understanding Your Toilet Seat Fixings
Before you start, identify the type of fixings holding your current seat in place. This will dictate your removal strategy:
- Bottom-Fix (or Standard Fix): These are the most common. Bolts pass through holes in the ceramic toilet pan, and nuts are tightened from underneath. You'll typically find plastic or metal nuts.
- Top-Fix: Often found on modern, back-to-wall, or wall-hung toilets where access underneath the pan is limited or impossible. The fixings (usually an expanding plug and a screw) are inserted and tightened from the top of the pan, often concealed under chrome or plastic caps.
- Quick-Release: Many modern seats feature quick-release buttons or tabs on the hinges, allowing the seat to be lifted off the fixings for easy cleaning. The fixings themselves can be either top-fix or bottom-fix.
Tools You'll Need
Gathering your tools beforehand will save you time and frustration:
- Flathead and Phillips head screwdrivers (or a multi-bit screwdriver)
- Adjustable spanner or wrench (for bottom-fix nuts)
- Tape measure
- Clean cloths or old towels
- Rubber gloves
- Safety glasses
- For stuck fixings:
- Penetrating oil (e.g., WD-40)
- Junior hacksaw or oscillating multi-tool with a metal-cutting blade
- Pliers or mole grips
- Utility knife or small pry tool
Safety First
While replacing a toilet seat is generally low-risk, always prioritise safety:
- Wear safety glasses, especially when cutting or dealing with potentially brittle plastic.
- Use gloves to protect your hands and for hygiene.
- Be careful when using sharp tools like hacksaws or utility knives to avoid injury to yourself or damage to the toilet pan.
- Avoid overtightening new fixings, as this can crack the ceramic pan.
Step-by-Step Guide to Replacing Your Toilet Seat
Part 1: Removing the Old Seat
- Access the Fixings:For bottom-fix seats, look underneath the back of the toilet pan. You'll see the ends of the bolts and the nuts. For top-fix seats, lift the plastic or chrome hinge covers on top of the seat to reveal the screws.
- Attempt Standard Removal:For bottom-fix: Use your adjustable spanner to hold the nut underneath while you unscrew the bolt from the top with a screwdriver. For top-fix: Simply unscrew the screws from the top.
- Dealing with Stuck Bottom-Fix Nuts:This is where things can get tricky.
- Apply Penetrating Oil: If the nuts are corroded or seized, spray them generously with penetrating oil. Let it soak for at least 15-30 minutes, then try again. Reapply and wait longer if needed.
- Use Mole Grips: If the nut is rounded or the spanner slips, clamp mole grips firmly onto the nut and try to twist it off.
- Cut the Bolts: If all else fails, you'll need to cut the bolts. Carefully slide a junior hacksaw blade or an oscillating multi-tool blade between the nut and the ceramic pan. Take extreme care not to scratch or chip the toilet pan. You might need to make two cuts per bolt.
- Dealing with Stuck Top-Fix Plugs:These are often plastic and can expand firmly.
- Try Prying: If the screw just spins or is seized, try gently prying up the plastic plug with a thin flathead screwdriver or utility knife while unscrewing. This can sometimes release the tension.
- Drill Out (Extreme Caution): As a last resort, and only if you're confident, you can carefully drill out the centre of the screw head (using a drill bit slightly wider than the screw shaft but narrower than the plug diameter). Once the head is off, you should be able to remove the plastic plug. This carries a high risk of damaging the pan if not done precisely. If you're unsure or encounter significant issues, a qualified plumber can handle it quickly. You can tell us your emergency at FixDelivered and get help fast.
- Clean the Area: Once the old seat and fixings are removed, thoroughly clean the ceramic pan around the hinge holes. This is a perfect opportunity to get rid of any grime or limescale.
Part 2: Choosing and Installing Your New Seat
Before purchasing a new seat, measure your toilet carefully:
- Hinge Hole Distance: Measure the distance between the two hinge holes on your toilet pan (centre to centre).
- Length: Measure from the centre of the hinge holes to the very front edge of the pan.
- Width: Measure the widest point of the toilet pan.
- Shape: Note the shape of your toilet bowl (e.g., round, D-shaped, square, oval).
Most new toilet seats come with both top-fix and bottom-fix options, or adapters for both.
- Unpack and Inspect: Lay out all parts of your new toilet seat and ensure everything is present according to the manufacturer's instructions.
- Assemble Hinges (if required): Some seats come with hinges separate from the seat itself. Attach them as per the instructions.
- Position the Fixings: Insert the new fixings into the toilet pan holes.
- For bottom-fix: Drop the bolts through the holes and loosely attach the nuts underneath.
- For top-fix: Insert the expanding plugs into the holes and place the hinge posts over them.
- Attach the Seat: Align the seat onto the hinge posts. Many modern seats have adjustable hinges that allow you to slide the seat back and forth or side to side for a perfect fit.
- Adjust and Tighten: Once the seat is perfectly aligned with the toilet pan, tighten the fixings. For bottom-fix, hold the nut and tighten the bolt. For top-fix, tighten the screws from above. Remember not to overtighten, as this can damage the ceramic.
- Test Stability: Gently sit on the seat to ensure it feels secure and doesn't wobble.
When to Call a Professional
While replacing a toilet seat is a common DIY task, there are times when it's best to call in an expert:
- Risk of Damage: If you're struggling to remove extremely stubborn fixings and fear you might crack or chip the ceramic pan, stop and seek help.
- Existing Toilet Issues: If your toilet itself is wobbly, leaking, or has other underlying issues, a plumber can address these while replacing the seat.
- Lack of Confidence or Time: If you're not comfortable with DIY or simply don't have the time, a professional plumber can complete the job quickly and efficiently.
A qualified plumber can make short work of even the most stubborn fixings, ensuring no damage to your toilet. For more complex issues or if you simply prefer a professional touch, find a local plumber through FixDelivered. They'll have the right tools and expertise to handle any tricky situation, often quicker than you might manage yourself.
How Much Does a New Toilet Seat Cost? (2026 Guide)
The cost of a new toilet seat in the UK can vary significantly based on material, features, and brand. As a rough guide for 2026:
- Basic plastic seats: £20 - £40
- Moulded wood or MDF seats: £30 - £70
- Soft-close or quick-release features: £40 - £100
- Designer or specialist seats: £80 - £150+
Installation by a plumber, if required, would typically add their call-out fee and hourly rate, which can range from £70-£120 for a simple job, depending on your location and the time of day.
Replacing a toilet seat is a rewarding DIY project that can significantly improve your bathroom's hygiene and comfort. With the right tools and a bit of patience, even stuck fixings can be overcome. If DIY isn't for you, or you hit a snag, remember that finding a reliable local plumber is straightforward with FixDelivered. Get a plumber now and let a professional handle it.
Frequently asked questions
How long does it take to replace a toilet seat?
A standard toilet seat replacement typically takes 15-30 minutes. If you encounter stubborn or stuck fixings, it could take 1-2 hours, depending on the severity and your DIY experience.
Do all toilet seats fit all toilets?
No, toilet seats are not universally sized. You need to measure your toilet pan's hinge hole distance, length from hinges to the front, and width at the widest point, as well as note its shape (e.g., round, D-shaped) to ensure a proper fit.
What's the difference between top-fix and bottom-fix toilet seats?
Bottom-fix seats have bolts that go through the toilet pan, secured by nuts underneath. Top-fix seats have fixings that expand into the pan holes from above, often used when there's no access underneath the toilet.
When should I call a plumber to replace my toilet seat?
You should call a plumber if you cannot remove old, stuck fixings without risking damage to the ceramic pan, if you notice other issues with the toilet (like wobbling or leaks), or if you simply prefer a professional to handle the task for efficiency and peace of mind.
Can I use a hacksaw to remove stuck toilet seat bolts?
Yes, a junior hacksaw or an oscillating multi-tool can be used to cut through rusted or seized bolts, particularly for bottom-fix seats. Extreme care must be taken to avoid scratching or damaging the ceramic toilet pan during this process.
Need a plumber now? Tell us your emergency and FixDelivered will find and confirm an available local plumber near you, usually within the hour.
Written by the FixDelivered Team. Reviewed by Rupert Lowe, Editor. Last updated 2026-10-02.