How to Fit a New Kitchen or Basin Tap: UK DIY Guide
By The FixDelivered Team · Updated 2026-08-13 · 6 min read
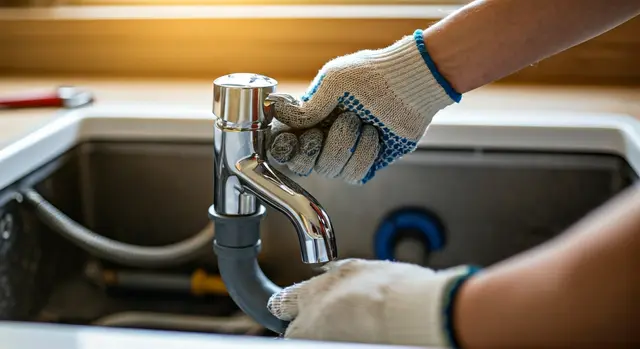
A dripping tap can be annoying, wasteful, and costly, not to mention an eyesore. Whether you're upgrading your kitchen, giving your bathroom a facelift, or simply replacing a faulty unit, fitting a new tap is a satisfying DIY project that can save you money. This guide will walk you through the process of how to change a tap, specifically focusing on kitchen and basin taps, providing clear, step-by-step instructions for a confident DIYer.
Why Replace Your Tap?
There are several reasons homeowners choose to replace their taps:
- Leaks and drips: The most common reason. Worn washers or internal components can lead to constant dripping, wasting water and potentially causing damage.
- Poor performance: Low water pressure, inconsistent temperature, or difficulty turning the tap on/off can all be signs it's time for an upgrade.
- Aesthetics: A new tap can instantly modernise the look of your kitchen or bathroom, complementing a renovation or simply updating an outdated style.
- Efficiency: Modern taps often feature water-saving technologies, reducing your utility bills.
Tools You'll Need
Having the right tools makes the job much easier and safer. Gather these before you start:
- Adjustable spanner or basin wrench: Essential for reaching and loosening nuts in tight spaces under the sink.
- Screwdriver: Flathead and/or Phillips, depending on your tap's fixings.
- Bucket or bowl: To catch any residual water when disconnecting pipes.
- Sponges and rags: For mopping up spills.
- PTFE tape (Plumber's tape): For sealing threaded connections.
- Torch or headlamp: For better visibility under the sink.
- Safety goggles: To protect your eyes from debris or drips.
- Wire brush: Handy for cleaning old pipe threads if needed.
- Penknife or utility knife: For cutting sealant or old washers.
Safety First!
Always prioritise safety when working with plumbing:
- Turn off the water mains: Locate your main stopcock (usually under the kitchen sink or near your water meter) and turn it off completely before starting any work.
- Drain the system: Once the mains are off, open the lowest tap in your house to drain residual water from the pipes.
- Electrical safety: Be mindful of any electrical outlets or appliances near your sink. If in doubt, switch off the power to the area at your consumer unit.
- Wear appropriate PPE: Safety goggles are a must.
- Don't over-tighten: While connections need to be secure, over-tightening can damage threads or components.
Before You Start: Choosing Your New Tap
Careful selection of your new tap will prevent headaches later:
- Tap holes: Check if your sink or basin has one, two, or three tap holes. Most modern mixer taps require a single hole, while traditional pillar taps need two. Ensure your new tap matches your existing setup, or be prepared to modify (which can be complex).
- Water pressure: Some taps are designed for high-pressure systems, others for low pressure. Check your home's water pressure and choose a compatible tap.
- Flexible connectors: Most new taps come with flexible hoses. Check their length to ensure they will reach your existing isolation valves. Also, confirm the thread size matches your valves (typically 15mm compression).
- Isolation valves: It's highly recommended to have isolation valves on the hot and cold water supply lines leading to your tap. These allow you to turn off the water to just the tap, rather than the whole house, for future maintenance. If you don't have them, consider having them installed.
Step-by-Step: How to Fit Your New Tap
Follow these steps carefully to fit your new tap:
Turn Off the Water Supply
Locate your main stopcock and turn it clockwise until the water supply to your home is completely shut off. Open a cold tap downstairs (like the kitchen tap) and an upstairs hot tap to help drain the system and relieve pressure.
Clear the Area Under the Sink
Remove everything from under the sink to give yourself ample working space. Place your bucket or bowl directly under the old tap's connections.
Disconnect the Old Tap's Water Supply
Using your adjustable spanner or basin wrench, loosen the nuts connecting the flexible hoses (or copper pipes) from the old tap to the hot and cold water supply lines. Be prepared for some water to drip out. Disconnect both hoses.
Remove the Old Tap Fixings
Look up under the sink directly beneath the tap. You'll typically find a large nut or a horseshoe-shaped washer with two smaller nuts securing the tap in place. Use your basin wrench or spanner to loosen and remove these fixings. Once loosened, you should be able to lift the old tap out from above the sink.
Clean the Area
Thoroughly clean the tap hole area on your sink or basin. Remove any old sealant, grime, or rust to ensure a good seal for the new tap.
Prepare the New Tap
Attach the flexible connector hoses to the base of your new tap, hand-tightening them firmly. Apply a few wraps of PTFE tape clockwise around the threads of the flexible hoses where they will connect to the isolation valves. Ensure any base seals or O-rings supplied with the new tap are correctly fitted to its base.
Position the New Tap
Carefully feed the flexible hoses and the tap's fixing bolt (if applicable) through the tap hole from above the sink. Ensure the tap is facing the correct direction and is centred. From underneath, slide on any rubber and metal washers, followed by the securing nut or plate. Hand-tighten these fixings.
Secure the New Tap
Using your basin wrench or spanner, fully tighten the securing nut or plate from underneath the sink. Be firm, but avoid over-tightening which could damage the tap or sink. Ensure the tap remains straight and secure.
Connect the Flexible Hoses
Connect the hot and cold flexible hoses from the new tap to their respective isolation valves. Hand-tighten first, then use your spanner to give them a final quarter to half turn. Do not overtighten. Ensure the hot and cold connections are correct (hot on the left, cold on the right, as you look at the tap).
Restore Water Supply and Check for Leaks
Slowly turn your main stopcock back on. Watch carefully under the sink for any signs of leaks around the connections. Turn the new tap on slowly, first cold, then hot, to flush out any air and check the flow. Continue to monitor for leaks for several minutes.
When to Call a Professional
While fitting a new tap is a manageable DIY task, there are situations where calling a professional plumber is the safest and most efficient option:
- No isolation valves: If your existing pipework lacks isolation valves and you're not confident installing them yourself.
- Incompatible tap holes: If your new tap doesn't match the existing holes and you're unsure about modifying your sink or countertop.
- Seized or damaged pipework: Old, corroded, or seized connections can be difficult and risky to remove without causing further damage.
- Inaccessible fixings: If you cannot reach the old tap's fixings due to tight spaces or obstructions.
- Any doubt or lack of confidence: It's always better to be safe than sorry. A professional can ensure the job is done correctly and safely.
- Persistent leaks: If you've followed all the steps and still have leaks, it's time to call an expert.
If you encounter any issues or prefer a professional touch, FixDelivered can connect you with find a local plumber quickly. We can help you find emergency plumbers near you, often arriving within hours.
Need a Plumber Fast?
Replacing a tap can be straightforward, but plumbing emergencies or unexpected complications can arise. If you find yourself in need of expert assistance, FixDelivered offers a reliable way to connect with qualified local plumbers across the UK. You can learn more about how FixDelivered works and book a plumber with confidence.
Should you need expert help, remember FixDelivered can help you get a plumber now.
Frequently asked questions
How long does it take to fit a new tap?
For an experienced DIYer, replacing a standard kitchen or basin tap typically takes 1-3 hours, assuming no major complications like seized nuts or pipework modifications. If you're new to plumbing, allow more time.
Do I need special tools to change a tap?
While most common household tools are useful, a basin wrench or an adjustable spanner is essential for reaching and loosening the nuts in the confined space under a sink. PTFE tape is also a must for sealing connections.
Can I replace a two-hole tap with a one-hole mixer tap?
Yes, but it requires covering the unused tap holes. This can be done with a blanking plate (usually a chrome disc) or by replacing the entire sink or basin with one that has a single tap hole. It's generally easier to replace like-for-like.
What if my old tap fixings are seized?
Seized nuts can be challenging. You can try applying penetrating oil and letting it soak, or using a wire brush to clean any corrosion. If they still won't budge, it might be best to call a professional plumber to avoid damaging pipes or the sink.
How much does a plumber charge to fit a new tap in the UK?
As a rough guide for 2026, a plumber might charge between £80 and £150 for labour to fit a new tap, depending on your location, the complexity of the job, and whether any extra parts (like isolation valves) are needed. This usually doesn't include the cost of the new tap itself. FixDelivered offers upfront pricing so you know the callout fee before work begins.
Need a plumber now? Tell us your emergency and FixDelivered will find and confirm an available local plumber near you, usually within the hour.
Written by the FixDelivered Team. Reviewed by Rupert Lowe, Editor. Last updated 2026-08-13.