Replace Radiator Valve: DIY Guide to Fitting a TRV
By The FixDelivered Team · Updated 2026-08-28 · 5 min read
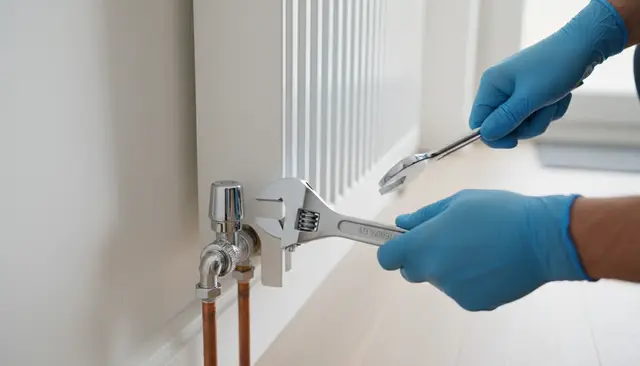
A faulty or leaking radiator valve can cause damp patches, reduce heating efficiency, and even lead to bigger plumbing problems if left unattended. Upgrading to a Thermostatic Radiator Valve (TRV) can also significantly improve your home's energy efficiency and comfort by allowing you to control individual room temperatures. This guide will walk you through the process of replacing a standard radiator valve or fitting a new TRV.
Tools You'll Need
- Adjustable spanners (two are ideal)
- PTFE tape
- Radiator key (for bleeding)
- Bucket or shallow tray
- Old towels or rags
- Pipe cutters (if pipe needs shortening)
- Wire brush (for cleaning threads)
- Screwdriver (for some TRV models)
- New radiator valve or TRV
Safety First
Working with your central heating system involves water and potentially hot components. Always prioritise safety:
- Turn off your central heating system completely and allow it to cool down before you begin. Never work on a hot system.
- Be prepared for water spills. Even after draining, there will always be some residual water. Protect your floors with towels and have a bucket ready.
- Never attempt to work on gas boilers or gas lines yourself. If your boiler is gas-fired and you encounter any issues related to the boiler unit or gas supply, you must always contact a Gas Safe registered plumber.
- If you are unsure at any point, or if you encounter unexpected difficulties, stop immediately and call a professional.
Step-by-Step Guide: Replacing a Radiator Valve or Fitting a TRV
Isolate and Drain the Radiator
Ensure your central heating is off and the system is cold. Close both the lockshield valve (usually covered by a plastic cap) and the valve you intend to replace on the radiator. Use a radiator key to open the bleed valve at the top of the radiator. Place your bucket or tray directly under the valve you're replacing. Carefully loosen the large union nut connecting the valve to the radiator. Water will begin to drain from the radiator into your bucket. Once the water flow stops, fully remove the old valve.
Prepare the New Valve
Clean the threads on both the radiator tail (the part that screws into the radiator) and the pipework thoroughly with a wire brush if necessary. Apply PTFE tape clockwise around the thread of the radiator tail. Typically, 10-15 wraps are sufficient to create a watertight seal. Screw the radiator tail (which comes with your new valve) into the radiator by hand, then tighten gently with a spanner.
Connect the New Valve/TRV
Position the new valve or TRV. If fitting a TRV, ensure the flow direction arrow on the valve body points towards the radiator. Connect the valve to the pipework. You may need to use pipe cutters to shorten the pipe if the new valve is a different size. Hand-tighten the union nuts connecting the valve to the radiator tail and the pipework. Once hand-tight, use two adjustable spanners to carefully tighten both nuts securely – one to hold the valve body, the other to turn the nut. Do not overtighten, as this can damage the fittings.
Refill the System
Once the new valve is securely in place, open both the new radiator valve and the lockshield valve. Open any other radiator valves in your home that might have been closed. Turn your central heating system back on. Monitor your boiler's pressure gauge and top up the system pressure if needed (typically to 1-1.5 bar when cold, check your boiler's manual).
Bleed the Radiator
As the system refills and heats up, air will be pushed into the radiator. Use your radiator key to open the bleed valve on the radiator. Listen for air escaping. Once water starts to come out steadily (not just spitting), close the bleed valve. Re-check your boiler's pressure and top up if it has dropped.
Check for Leaks
Carefully inspect all connections on the newly fitted valve for any signs of drips or leaks. Leave the heating on for a while and re-check periodically to ensure everything is watertight. Any small drips should be addressed immediately by gently tightening the nuts further.
When to Call a Professional
While replacing a radiator valve is a common DIY task, there are times when calling a professional is the safest and most efficient option:
- If you are unsure about any step of the process or lack confidence in your abilities.
- If you encounter seized pipes, corroded valves, or other unexpected complications.
- If the system won't repressurise after refilling, or you suspect an issue with your boiler.
- If you don't have the correct tools or simply don't have the time to tackle the job.
For a qualified, local professional who can handle this quickly and safely, you can tell us your emergency and get help fast. In 2026, you can typically expect to pay between £80-£150 for a plumber to replace a single radiator valve, plus the cost of the valve itself. This can vary based on your location, the urgency of the job, and its complexity. For transparent pricing, you can use services like FixDelivered where the plumber's callout fee is agreed upfront.
Replacing a radiator valve can save you money and improve heating efficiency. However, if you're not confident in tackling the job, it's always best to call in a professional. FixDelivered connects you with experienced, vetted plumbers in your area quickly. You can learn more about how FixDelivered works or find a local plumber to handle this for you. For more helpful advice on common household plumbing issues, explore our plumbing emergency guides.
Frequently asked questions
How long does it take to replace a radiator valve?
Typically, for a competent DIY enthusiast, replacing a radiator valve can take between 1 to 2 hours, assuming the system draining and refilling process goes smoothly. A professional plumber might complete the job more quickly due to experience and specialised tools.
Do I need to drain the whole central heating system?
Not necessarily the entire system. You only need to drain the system down to the level of the radiator you are working on. If it's an upstairs radiator, simply closing both valves on that radiator and bleeding it can often be enough to drain it locally. For a ground floor radiator, you might need to drain a significant portion of the system, or even the whole system, to prevent water from flowing out.
What's the difference between a standard valve and a TRV?
A standard manual radiator valve simply acts as an on/off switch, allowing you to manually control the flow of hot water into the radiator. A Thermostatic Radiator Valve (TRV), on the other hand, allows you to set a desired room temperature. It then automatically adjusts the flow of hot water into the radiator to maintain that temperature, helping to save energy and improve comfort by preventing rooms from overheating.
How much does a plumber charge to replace a radiator valve?
In the UK in 2026, you can typically expect to pay a plumber between £80-£150 to replace a single radiator valve, plus the cost of the new valve itself. This price can vary depending on your location, the urgency of the job (e.g., emergency call-out), and any unforeseen complexities. Services like FixDelivered allow you to agree the plumber's callout fee upfront for transparency.
Need a plumber now? Tell us your emergency and FixDelivered will find and confirm an available local plumber near you, usually within the hour.
Written by the FixDelivered Team. Reviewed by Rupert Lowe, Editor. Last updated 2026-08-28.