How to Replace a Toilet Fill Valve: UK DIY Guide
By The FixDelivered Team · Updated 2026-08-18 · 6 min read
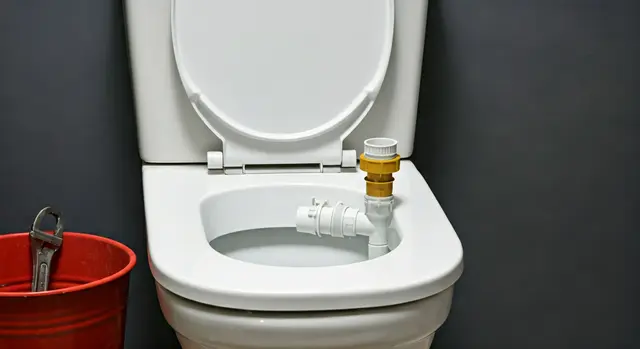
A toilet that constantly runs, fills slowly, or doesn't fill at all can be incredibly annoying and wasteful. In most cases, the problem lies with the fill valve, also known as a ballcock. This internal cistern component controls the water flow into the toilet bowl after flushing. Fortunately, replacing a faulty fill valve is a relatively straightforward DIY task that can save you money on plumber call-out fees.
What is a Toilet Fill Valve (Ballcock)?
The fill valve is the mechanism inside your toilet cistern that refills the tank with water after you flush. Older toilets often use a 'ballcock' style valve, which typically has a float arm and a ball that rises with the water level to shut off the supply. Modern toilets more commonly feature a 'float cup' style fill valve, which is more compact and often quieter. Both perform the same essential function: regulating the water level and stopping the flow when the cistern is full.
When to Replace Your Toilet Fill Valve
You'll typically know it's time to replace your fill valve if you notice any of these common issues:
- Constant Running Water: Water continuously flows into the toilet bowl, even when the cistern is full. This indicates the valve isn't shutting off properly.
- Slow Filling: The cistern takes a very long time to refill after flushing, suggesting a restricted or faulty valve.
- Not Filling at All: The cistern remains empty after flushing, meaning the valve isn't opening to let water in.
- Water Hammer: A banging noise in your pipes when the toilet finishes filling, which can sometimes be caused by an old or faulty fill valve closing too abruptly.
Tools and Materials You'll Need
Before you start, gather everything you'll need:
- New toilet fill valve (ensure it's compatible with your toilet type, e.g., bottom-entry or side-entry, and adjustable for height)
- Adjustable spanner or pipe wrench
- Bucket or old towels (for catching drips)
- Sponge or small cup (for bailing out remaining water)
- Screwdriver (flathead or Phillips, depending on your cistern fixings)
- Work gloves (optional, but recommended)
A new fill valve typically costs between £15 and £30, depending on the brand and type.
Safety First
Working with water can be messy, but it's generally safe. Always ensure the water supply to the toilet is completely off before you begin. Be careful not to overtighten connections, as this can crack porcelain or damage plastic fittings.
Step-by-Step Guide to Replacing Your Toilet Fill Valve
Follow these steps carefully to replace your toilet fill valve:
1. Turn Off the Water Supply
Locate the isolation valve (stopcock) for your toilet. This is usually a small handle or knob on the pipe leading to the bottom of the toilet cistern. Turn it clockwise until the water supply is completely off. If you can't find one, you may need to turn off the main water supply to your home.
2. Flush the Toilet to Empty the Cistern
Flush the toilet to drain most of the water from the cistern. Use a sponge or small cup to remove any remaining water from the bottom of the tank. This will prevent a mess when you disconnect the old valve.
3. Disconnect the Water Supply Pipe
Place your bucket or towels underneath the toilet's water inlet pipe. Using your adjustable spanner, carefully loosen the nut connecting the water supply pipe to the bottom of the fill valve. Be prepared for a small amount of residual water to drip out.
4. Remove the Old Fill Valve
Inside the cistern, you'll see a large nut holding the fill valve in place at the bottom. Reach under the cistern and use your spanner to loosen and remove this nut. Once the nut is off, you can lift the old fill valve out of the cistern.
5. Install the New Fill Valve
Insert the new fill valve into the hole at the bottom of the cistern. Ensure the rubber washer is correctly seated on the outside of the cistern, followed by the large retaining nut. Hand-tighten the nut first, then use your spanner to tighten it another quarter to half turn. Be firm but do not overtighten, as this can damage the cistern.
6. Reconnect the Water Supply Pipe
Carefully reconnect the water supply pipe to the bottom of the new fill valve. Hand-tighten the connection first, then use your spanner to gently tighten it until it's snug. Again, avoid overtightening.
7. Turn On Water and Test
Slowly turn the water supply isolation valve back on (counter-clockwise). The cistern should begin to fill. Check for any leaks around the new connections. Once the cistern is full, the fill valve should shut off the water flow completely. If it doesn't, or if the water level is too high or low, you'll need to adjust the float mechanism on the new fill valve according to the manufacturer's instructions. This usually involves a simple clip or screw adjustment.
Troubleshooting Common Issues
- Still Running: If the toilet still runs, the water level might be too high, causing water to flow into the overflow pipe. Adjust the fill valve's float mechanism downwards.
- Slow Filling: Check that the isolation valve is fully open. If it is, and the filling is still slow, there might be a blockage in the supply pipe or a faulty new valve (though rare).
- Leaks: If you notice leaks, gently tighten the nuts at the water supply connection and the base of the fill valve. If leaks persist, you may need to reseat the washers or check for cracks.
When to Call a Professional
While replacing a fill valve is a common DIY task, there are times when it's best to call in a professional. If you encounter any of the following, don't hesitate to seek expert help:
- You're unsure about any step or uncomfortable working with plumbing.
- The isolation valve is seized or doesn't work, meaning you can't turn off the water.
- You discover cracks in the cistern or other damage during the process.
- Leaks persist even after careful tightening and checking.
- The problem turns out to be more complex than just the fill valve.
For these situations, or if you simply prefer to have the job done by an expert, FixDelivered can connect you with emergency plumbers near you quickly. Our service makes it easy to tell us your emergency and get a qualified plumber to your door.
Typically, a plumber will charge between £80 and £150 for a call-out and to replace a fill valve, plus the cost of the part. This can vary based on your location and the time of day.
Conclusion
Replacing a toilet fill valve is a rewarding DIY project that can quickly resolve common toilet issues and prevent water waste. By following these steps, you can restore your toilet to proper working order. However, if you find yourself out of your depth, remember that professional help is always available through services like FixDelivered, ensuring your plumbing problems are resolved efficiently and safely. Learn more about how FixDelivered works to find a reliable plumber.
Frequently asked questions
How long does it take to replace a toilet fill valve?
For a competent DIYer, replacing a toilet fill valve typically takes between 30 minutes to an hour, assuming you have all the tools and the new part ready.
Do I need to turn off the main water supply to replace a fill valve?
Ideally, you should only need to turn off the isolation valve (stopcock) located on the pipe leading to your toilet cistern. If your toilet doesn't have one, or if it's faulty, then you would need to turn off the main water supply to your home.
What's the difference between a fill valve and a ballcock?
Historically, 'ballcock' referred to an older style of fill valve with a large floating ball. Today, 'fill valve' is a more general term for the mechanism that refills the toilet cistern, encompassing both the older ballcock designs and newer, more compact float-cup valves.
Can a faulty fill valve cause a high water bill?
Yes, absolutely. If your fill valve isn't shutting off properly and water is constantly running into the toilet bowl, it's wasting a significant amount of water. This continuous flow can lead to a surprisingly high water bill over time.
Need a plumber now? Tell us your emergency and FixDelivered will find and confirm an available local plumber near you, usually within the hour.
Written by the FixDelivered Team. Reviewed by Rupert Lowe, Editor. Last updated 2026-08-18.